
 Last year, several perspective clients approached McElroy Films to film “beauty” shots of their products to show on television and the web. Virtually every manufacturer, restaurant chain, and retailer benefits from well-lit, professional shots of their products to help draw in consumers, and it was something I had a background in during an intensive internship with Redtree Productions in Boston.
All we needed was a dynamic way to present products, and thus I went looking for low-cost, high-reward solutions. I immediately stumbled on some terrific YouTube videos that gave an easy to follow, step-by-step tutorial on how to build a do-it-yourself turntable. Being handy in the DIY department, I saw these turntable instructions as an easy project that would help us deliver our clients the product shots they wanted.
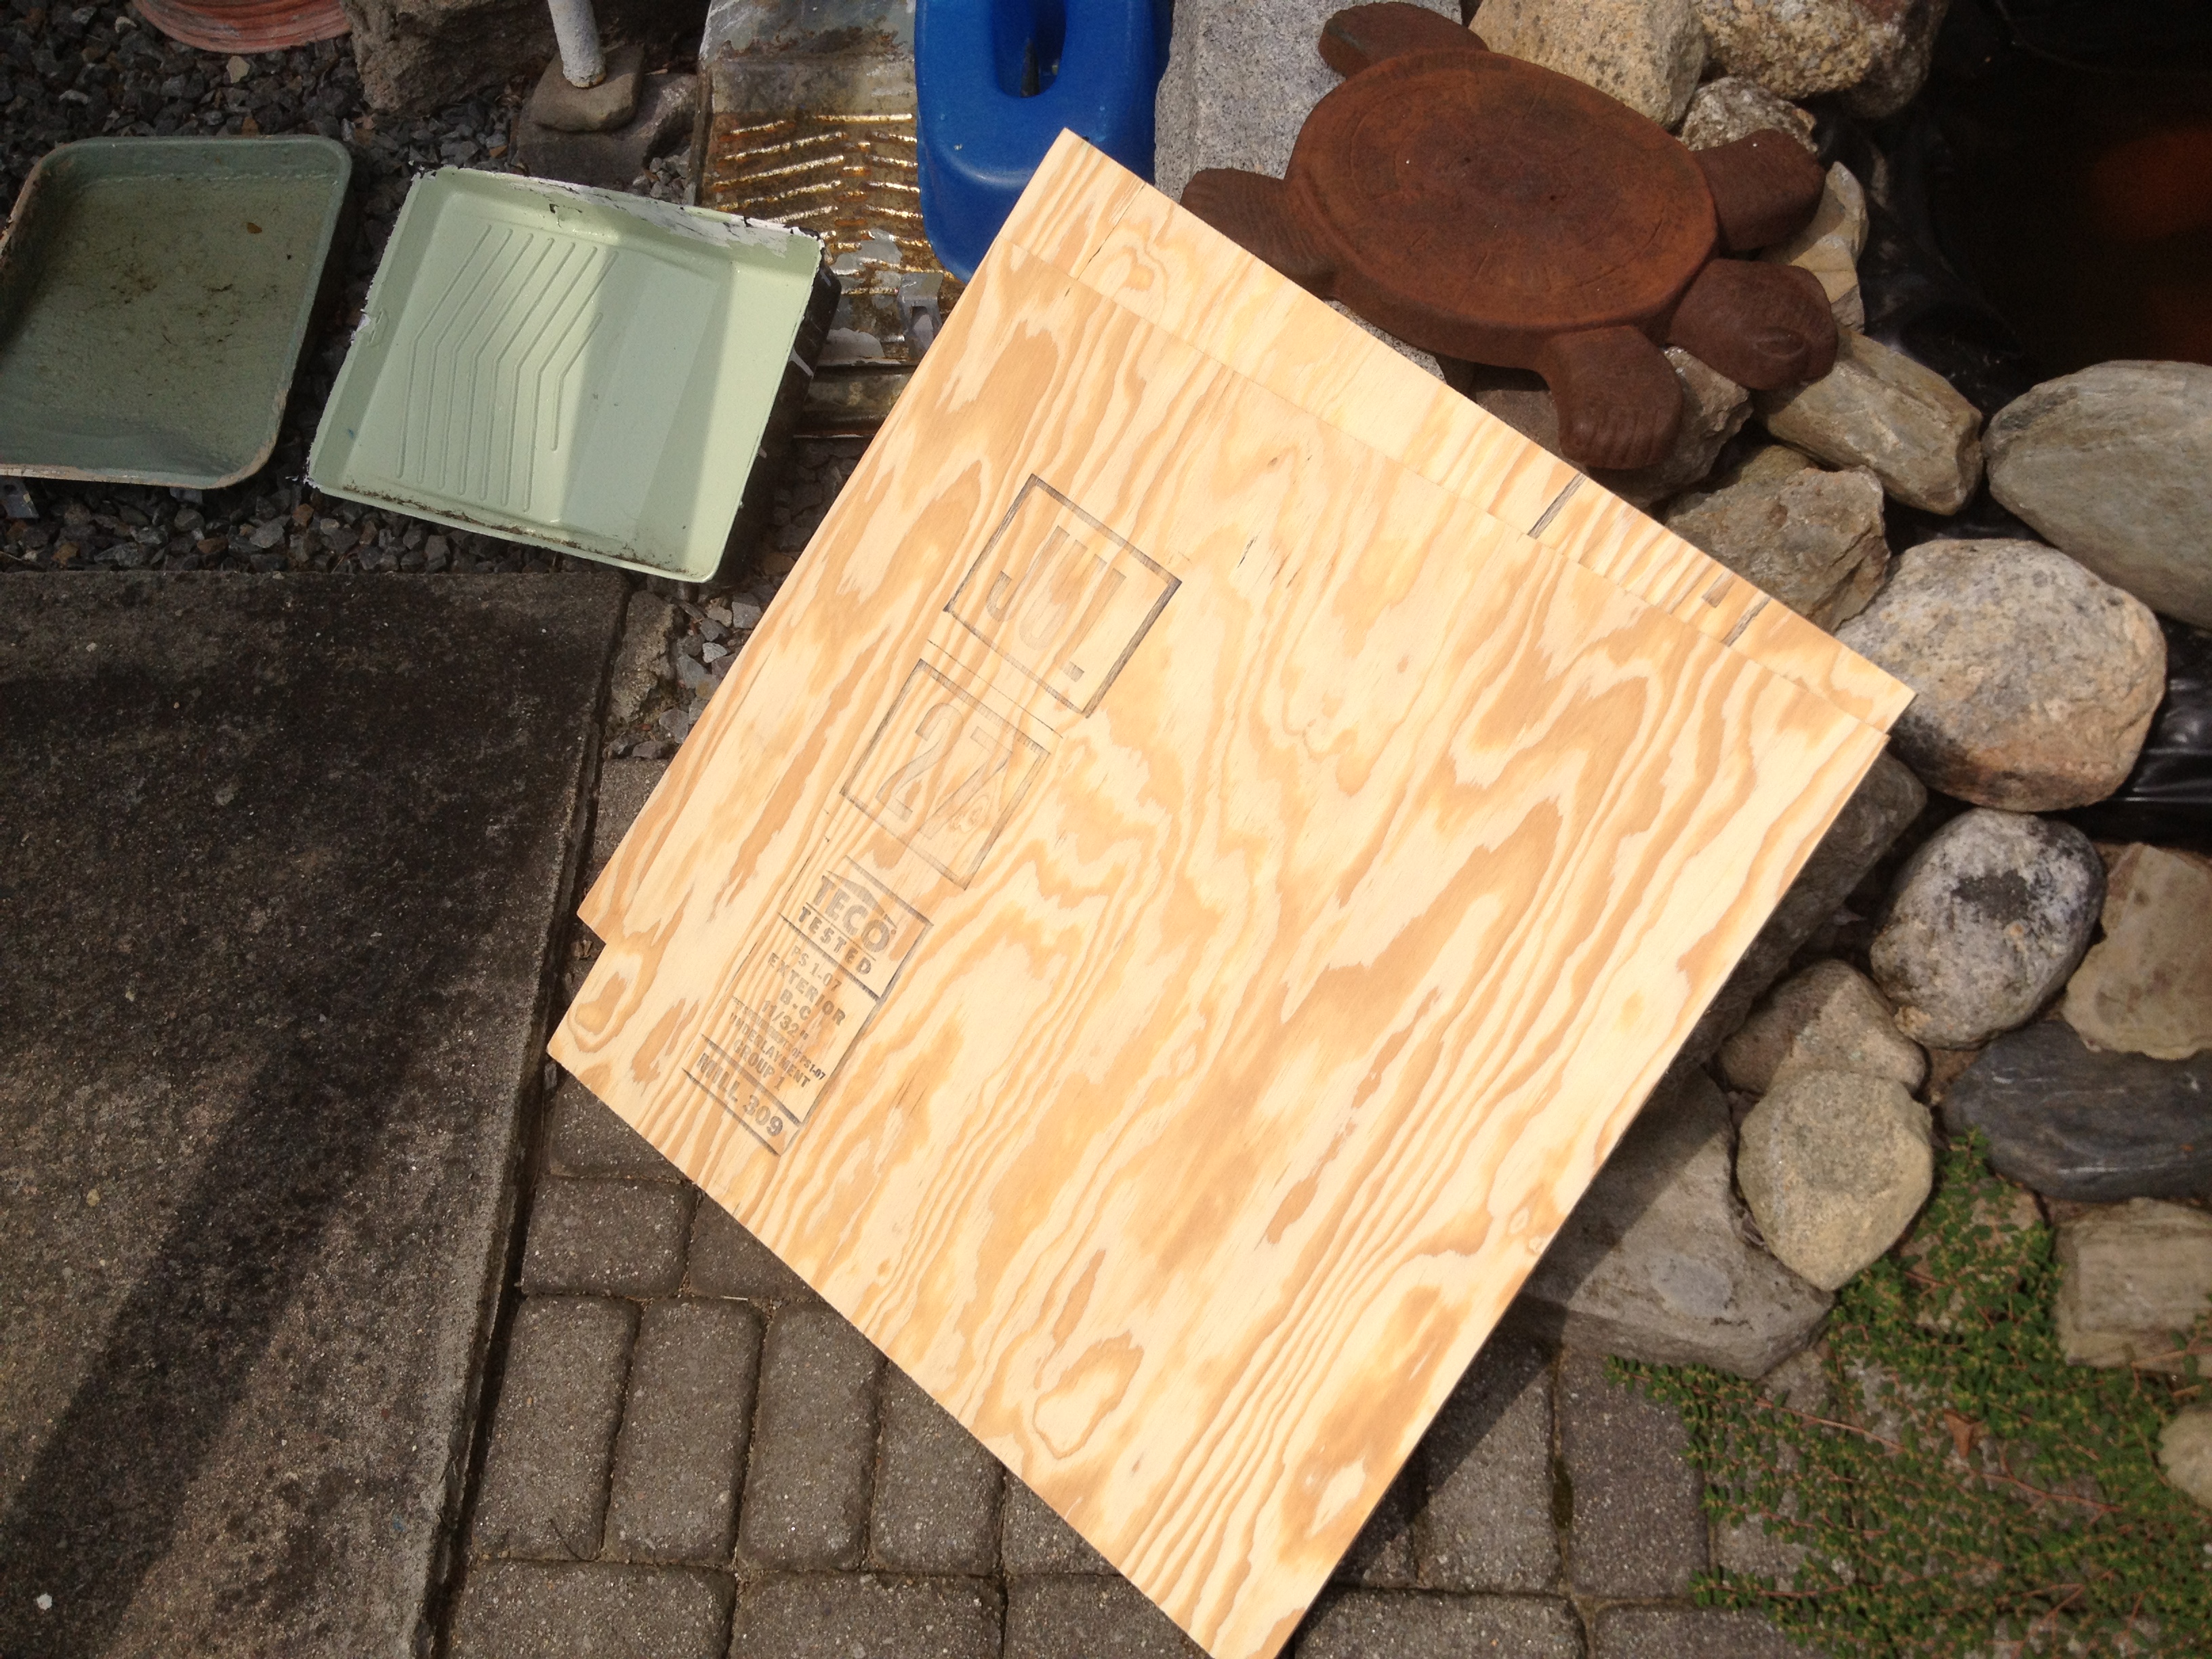
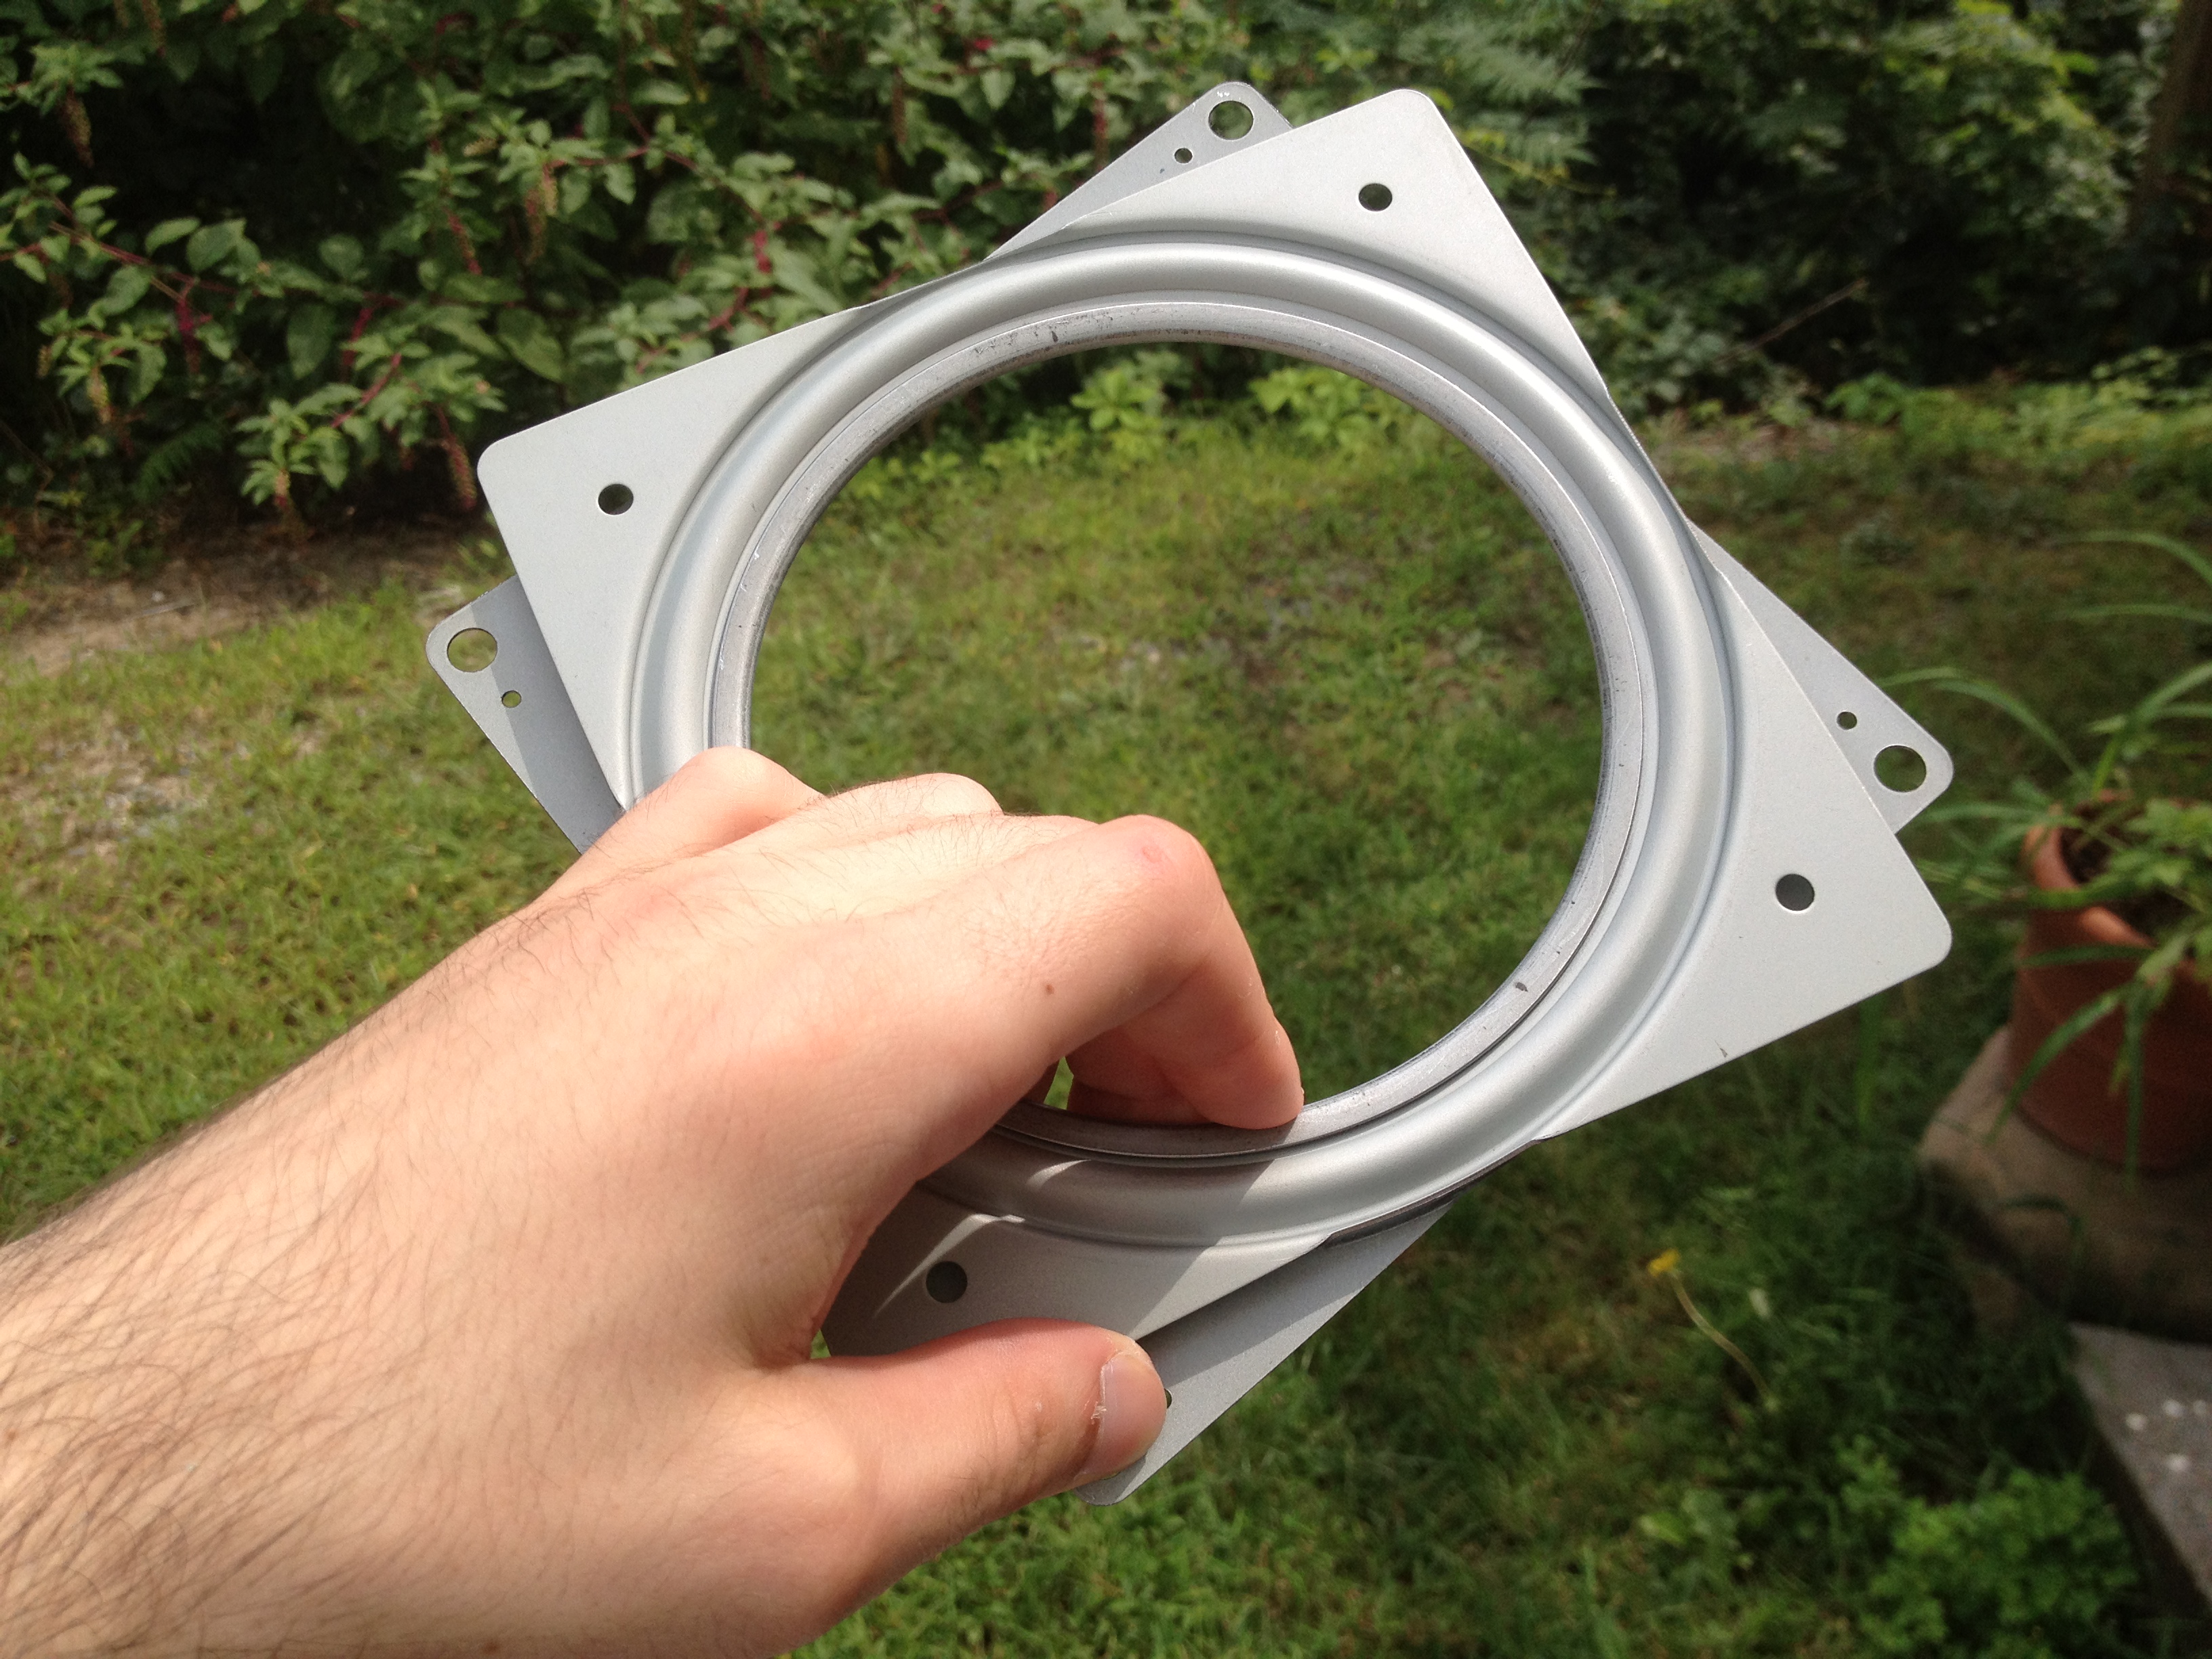
I started by collecting all the materials: A rotisserie motor from Walmart (on sale for about $20), 2 3’ squares of plywood (½” thick), some white fabric, a 2×4 that was lying in my basement, and a 6” wide Lazy Susan from Ace Hardware.
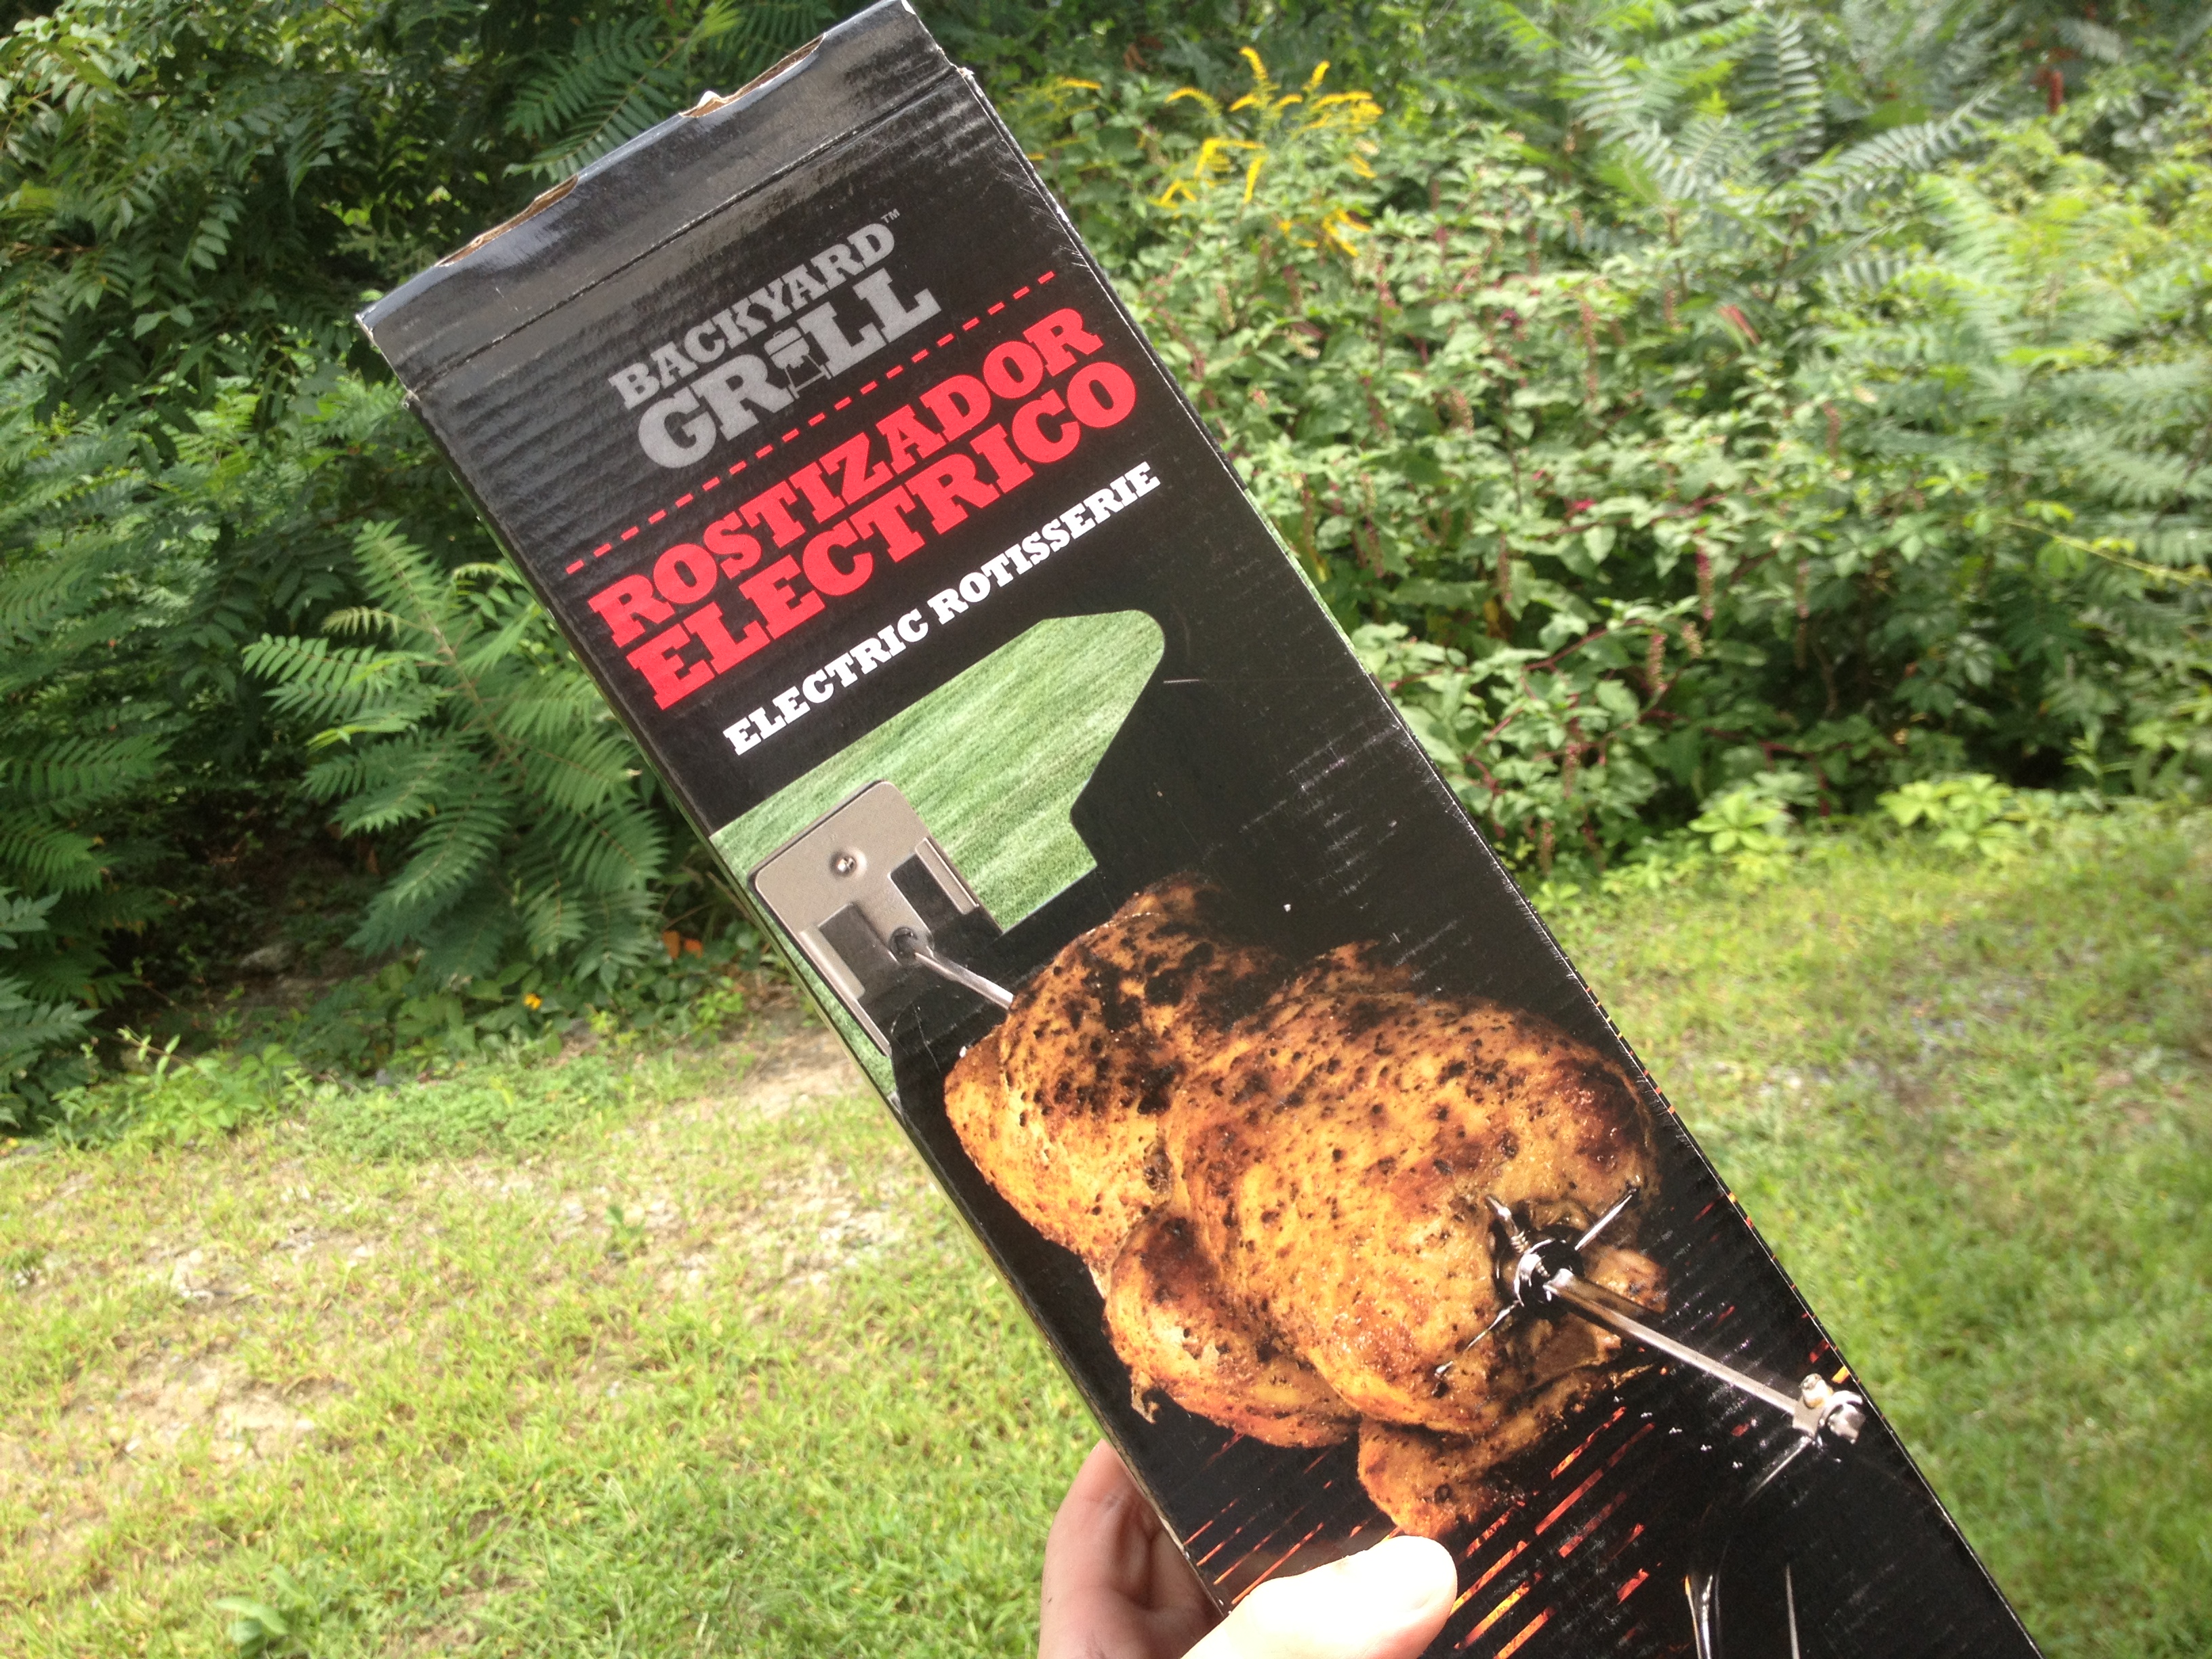
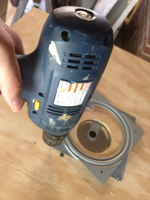
When I went to Walmart for the rotisserie motor, it was out-of-season so it sold for way cheaper than normal. I’m sure used one’s could be found for even a lower cost, but they have to come with the rod and, preferably, the bracket that mounts the motor over the grill.
Then I set to work!
I couldn’t find a pre-cut, circular piece of plywood to serve as the turntable, so I purchased 2 identical 3’ squares. One of them, the base, would go uncut and the other, I had to make into a circle.
With that, I carefully found the center of one of the plywood squares by measuring halfway down each side and drawing connecting lines across. I find that this usually works better than using the corners, but either way will work.
 Once I had the center marked out, I drilled a small hole at the center point using a basic drill press I had. You can also use a screw, but I drilled a hole because the rotisserie motor I bought came with a smooth metal cylinder piece. This improves the next step: To trace a circle, I tied a string around the cylinder. The smooth surface of the cylinder allows the string to rotate around easily without becoming bound up and helps you create a better circle. It’s also important to use a string that doesn’t have any elasticity. Yarn, rubber bands, and some shoestrings can expand and contract and give you an oval or ellipse shape rather than a perfect circle. And so, I used some braided string to tie around the center cylinder. The other end I looped around a pencil and away I traced! I made sure to get the circle as close to the edge of the plywood as possible to maximize the turntable surface.
 Next, I carefully cut the plywood along the line with a saber saw. Once it was cut out, I used a little sandpaper to smooth the edge, mainly so I didn’t prick myself with a splinter (those things hurt!).
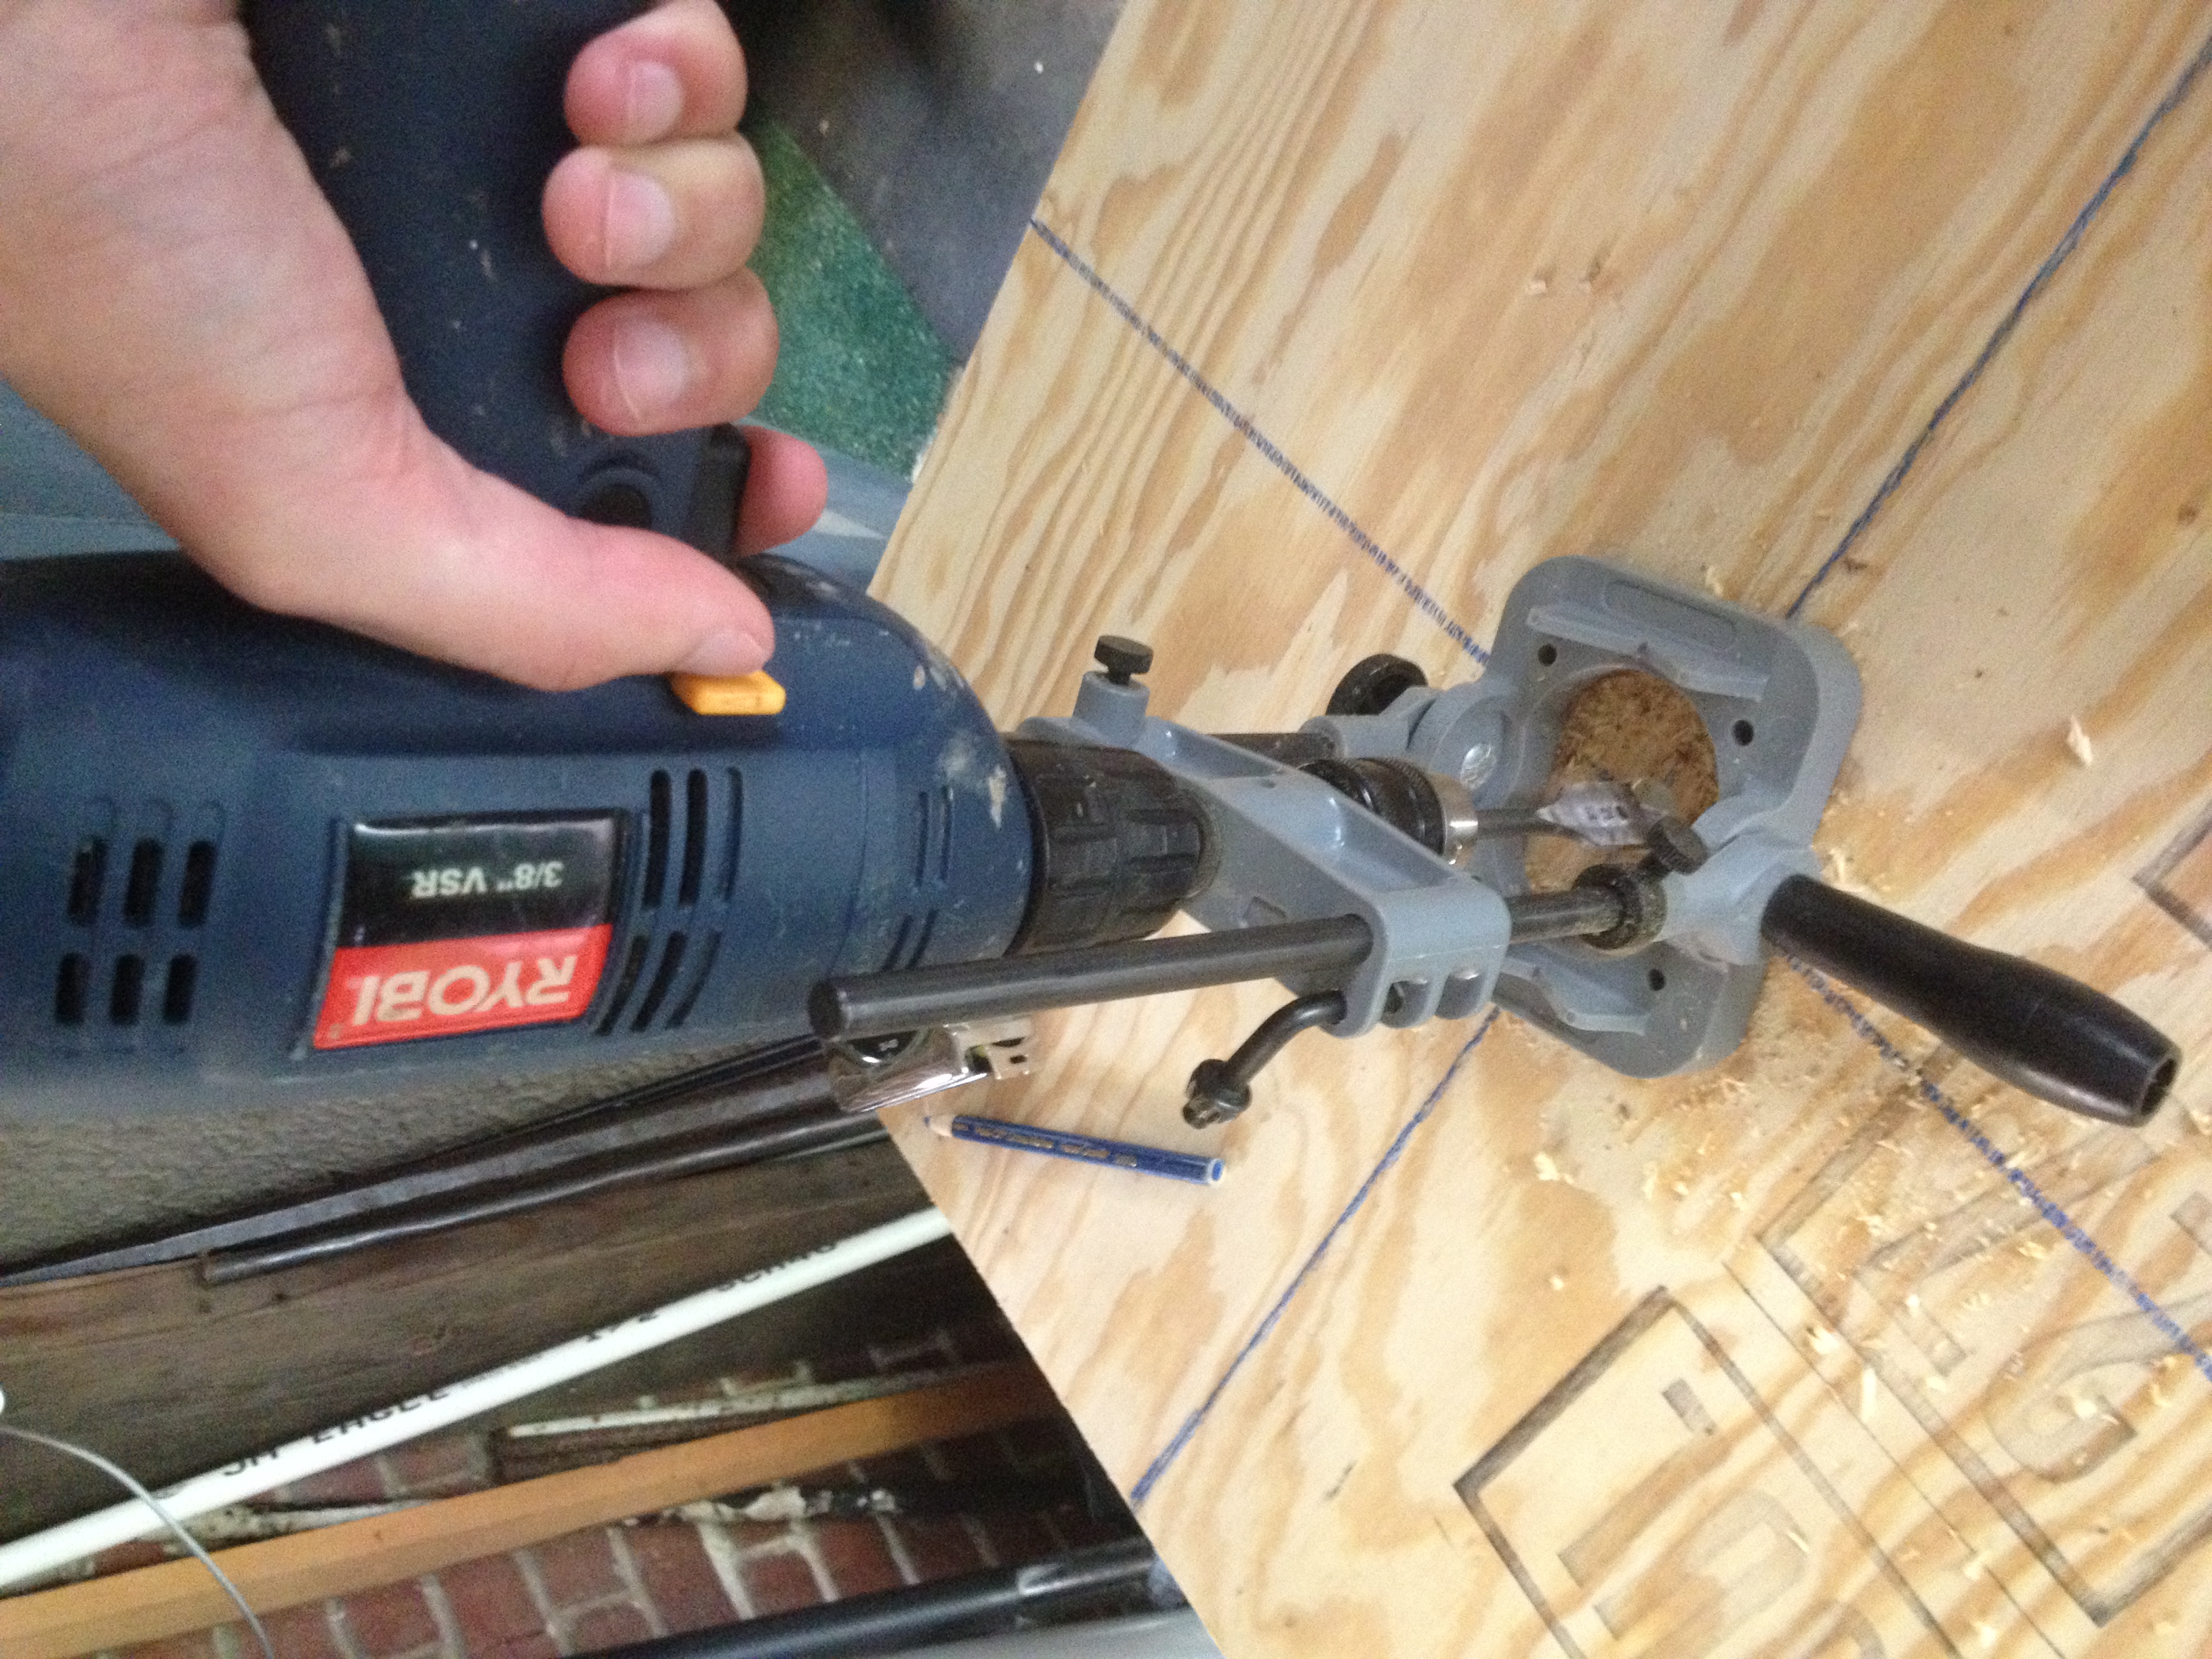
After the circle was cut out, I measured and marked the center of the other piece of plywood, then used a 3” doorknob drill bit to create a hole in the center. Technically, the hole could be as small as the rod that comes with the rotisserie, but it helps to have wider hole so you can fine-tune where the motor sits.
 Mounting the motor to the bottom of the board was my next task. The motor came with an ‘L’ shaped bracket that would normally allow the motor to sit on the edge of a grill, but it created the perfect way for me secure the motor. Using some scrap wood around the basement, I made a block for the bracket to screw into. You have to make sure that screws don’t go through the topside of the base, lest they might interfere with the spinning pieces. A little wood glue isn’t entirely necessary, but will hold everything together very snuggly. I had to be careful, as I needed the motor to be as close to the board as possible, but not so close as to not allow the motor to slide onto the bracket. It’s also important, of course, to make sure the center of the motor is centered on the hole or else the turntable top (the circle), would sit in an aesthetically displeasing way, albeit not affecting the performance of the machine.
To make the whole turntable stable, I cut a 2×4 I had in the basement in half and glued them on either side of the motor on the underside the vertical way. It’s important that the ‘legs’ of the table are taller than the motor so that the weight of the table isn’t resting on the motor. In that sense, you can create the ‘legs’ using any materials available to you as long as it’s sturdy and will create a level surface for the turntable. I used a little glue and screwed in the 2×4’s by going through the top of the base.
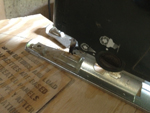
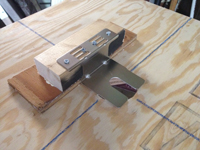
 Flipping the base over, topside up (motor below), I next screwed in the Lazy Susan. Be careful to center it on the motor! It’s not the end of the world if it’s not perfect as the other side of the Lazy Susan will not be screwed in, but the turntable performs at it’s best with it centered well.
The next step is difficult. I had to drill a hole just wide enough for the squared rod to fit snuggly through the circular tabletop. If the hole is too big, then the rod will just spin without taking the table spinning with it. I found a drill bit that was very close in diameter to the rod, drilled the hole, and hammered the rod through the hole. This kept the bugger snug. I didn’t have the means to create a square hole for the rod, but obviously that would have been the best route to take. It’s also important to know that wood will wear away and the metal of the rod, depending on how it was put through the wood, will eventually slip. That caused me to get creative and use one of the pieces that came with the rotisserie motor to make sure the turntable lasted.
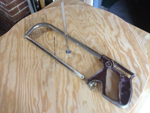 Well, I couldn’t just leave a big metal rod sticking through the table! I only had one rod, so it was important to get it right the first time. I put the circle on top of the base and ran the rod into the motor. At this point, I could plug in the motor and see the thing actually operate. Neato! It’s important that the rod goes all the way into the motor (so it doesn’t slip), but the circular platform also has to sit firmly on the Lazy Susan to prevent it from wobbling. Once I had the length of the rod figured out, I used a china marker to note where I needed to cut the excess and used a hack saw to lob it off. After the cut, I let it cool down (I’m an animal!), and used a metal file to take off any burrs or pointiness that I might cut myself on.
And then the turntable was complete!
 To add some finishing touches, the project I needed the turntable for called for the rotating surface to be white so I used a thick fabric and a staple gun to cover over the circular tabletop. A flat, but soft fabric is best for white because it will diffuse the light that’s aimed at it rather than creating glares that a painted surface might. A black surface can be painted no problem (as long as it’s a flat black) as black absorbs the light that hits it.
Coupled with professional lighting and a white backdrop, I was able to create the product video our client was looking for on their spec project and ultimately land the job. Over time, the DIY turntable’s weight limitations forced us to buy a heavy duty, professional turntable that we use today, but the experience, execution, and fun of creating this display method was definitely worth the time and still will find use in some of our future productions.